As an astrophotography enthusiast, few celestial events ignite my passion quite like a full moon. There’s something truly magical about capturing its luminous glow against the night sky. For those of us eagerly anticipating the next big lunar show, the March 2026 Full Moon Photography Tips guide you’re about to explore will be your ultimate companion. This isn’t just about pointing your camera at the sky; it’s about preparation, precision, and a dash of creative flair to truly immortalize the Full Worm Moon of March 2026.
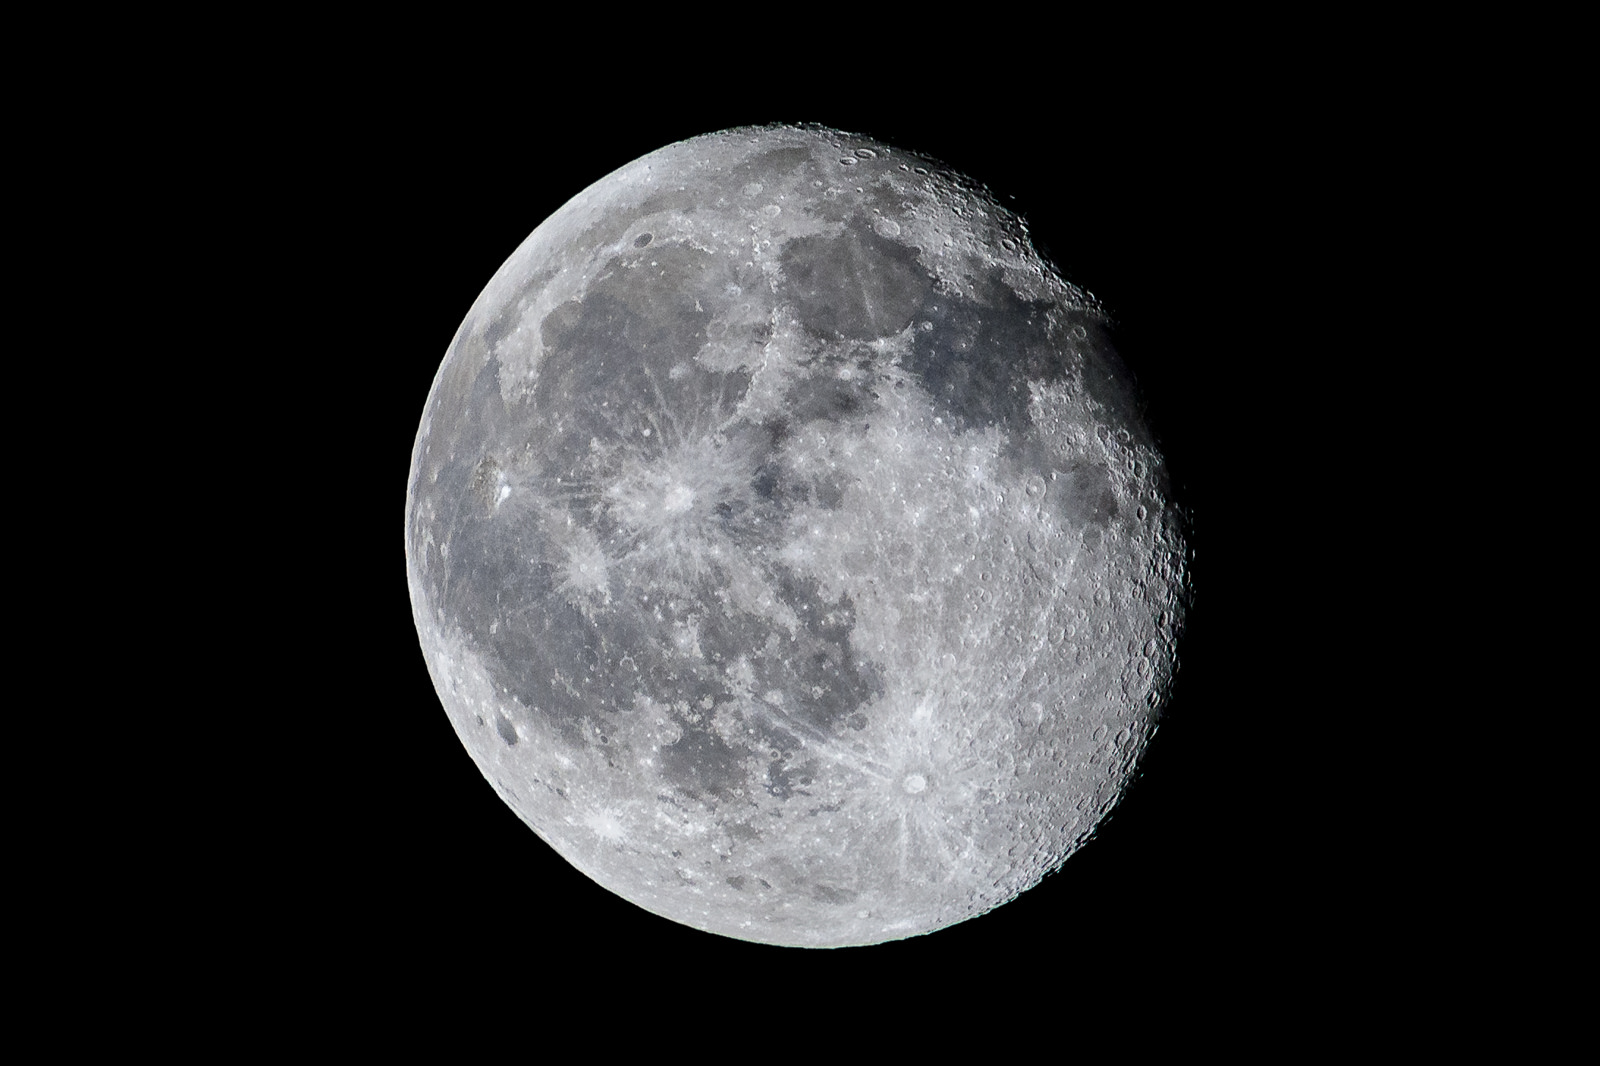
My own journey into full moon photography has been filled with trial and error, breathtaking successes, and invaluable lessons learned under the vast expanse of the night. I’ve spent countless hours scouting locations, meticulously adjusting settings, and battling the elements, all for that perfect shot. Let me share with you the insights I’ve gathered, ensuring your experience capturing the March 2026 Full Moon Photography Tips leads to truly stunning results.
Understanding the March 2026 Full Moon: The Worm Moon
Every full moon has a story, often tied to ancient traditions and natural cycles. The full moon in March is traditionally known as the Worm Moon.
This name originates from Native American cultures, marking the time when earthworms begin to emerge as the ground thaws, signaling the return of spring. In 2026, the Full Worm Moon is expected to grace our skies around March 25th. This specific timing is crucial for your planning.
Knowing the exact date and peak illumination is the first step in successful lunar photography. It allows you to synchronize your efforts with nature’s schedule.
Why the Worm Moon is Special for Photographers
The Worm Moon typically rises as the weather transitions from winter to spring. This can lead to unique atmospheric conditions. You might capture subtle hazes or dramatic cloud formations.
These elements can add an incredible mood and depth to your lunar photography. It’s an excellent opportunity to experiment with various compositional elements.
This particular full moon offers a compelling visual narrative as nature awakens.
Essential Gear for Capturing the March 2026 Full Moon
Having the right tools is paramount for any photographic endeavor. For full moon photography, specific equipment will make a significant difference in your results.
You don’t necessarily need the most expensive gear, but reliability and suitability are key. Let’s break down what you’ll need.
Camera Body Choices: DSLR vs. Mirrorless
Both DSLR and mirrorless cameras are excellent choices for lunar photography. Modern sensors in both types offer superb low-light performance.
Mirrorless cameras often provide advantages like live view magnification for precise focusing. DSLRs, on the other hand, boast a vast array of affordable telephoto lens options.
Ultimately, use the camera you are most comfortable with and understand its limitations.
The Importance of Lenses: Telephoto and Wide-Angle
For detailed shots of the moon’s surface, a long telephoto lens is indispensable. Think 200mm, 300mm, or even 400mm and beyond.
These lenses will magnify the moon, allowing you to capture intricate craters and textures. Consider a fast aperture (low f-number) if available for better light gathering, though for a full moon, you’ll often be stopped down for sharpness.
Alternatively, a wide-angle lens is perfect for capturing the moon within a landscape. This allows you to integrate the moon as a celestial element within a broader scene.
Tripod: Your Steadiest Companion
A sturdy tripod is non-negotiable for full moon photography. Even with relatively fast shutter speeds, any camera shake will blur your image.
Invest in a stable tripod that can support the weight of your camera and telephoto lens. This ensures sharp, crisp photos, especially crucial for detailed moon shots.
Wind can also be a factor, so a heavy-duty tripod is always a wise choice.
Remote Shutter Release: Avoiding Shake
Another critical accessory is a remote shutter release. Whether wired or wireless, it prevents you from touching the camera during exposure.
Pressing the shutter button directly can introduce subtle vibrations, leading to blurry images. A remote ensures absolute stillness at the moment of capture.
This simple tool is a game-changer for achieving maximum sharpness.
Other Useful Accessories
- Extra Batteries: Cold nights can drain batteries quickly.
- Headlamp with Red Light: To navigate in the dark without ruining your night vision.
- Lens Warmer/Dew Heater: Prevents condensation on your lens in cold, humid conditions.
- Lens Hood: Reduces flare and protects the front element.
- Memory Cards: Ensure you have enough storage for all your potential shots.
Mastering Your Camera Settings for Lunar Photography
Getting your settings right is a blend of art and science. The moon is incredibly bright, especially when full, but the surrounding sky is dark.
This dynamic range can be challenging. Let’s look at some foundational camera settings for moon photography.
The Looney 11 Rule: A Starting Point
For a good exposure of the moon itself, the ‘Looney 11’ rule is a classic guideline. It suggests setting your aperture to f/11.
Then, set your shutter speed to 1/ISO, meaning if your ISO is 100, your shutter speed should be 1/100th of a second. If ISO is 200, it’s 1/200th, and so on.
This rule provides a balanced exposure for the moon, preventing it from being overexposed.
ISO: Keeping It Low for Quality
Aim for the lowest possible ISO setting, typically ISO 100 or 200. This minimizes digital noise in your images.
While modern cameras handle higher ISOs well, lower ISOs always yield cleaner, more detailed results. Only increase ISO if absolutely necessary to achieve a faster shutter speed or a specific exposure for a wider scene.
Clean images are essential for showcasing fine lunar details.
Aperture: Sharpness vs. Depth
For capturing the moon’s details, an aperture around f/8 to f/16 is often ideal. This range provides excellent sharpness across the moon’s surface.
If you’re integrating the moon into a landscape, you might want a slightly wider aperture (e.g., f/5.6) to gather more light for the foreground. However, this might slightly compromise moon sharpness or depth of field for the foreground.
Experiment to find the sweet spot for your specific lens and desired effect.
Shutter Speed: Freezing Motion and Exposure
The moon moves surprisingly quickly across the sky. For a sharp moon, you’ll need a relatively fast shutter speed.
With the Looney 11 rule, speeds like 1/100s or 1/200s are common. If you’re shooting the moon with a foreground element, you might need to use longer exposures for the landscape and blend them later.
Always check your histogram to ensure you’re not clipping highlights on the moon.
Focusing: Manual Precision is Key
Autofocus can struggle in low light and with distant subjects. Switch to manual focus for the sharpest results.
Use your camera’s live view mode and zoom in to the moon as much as possible to achieve critical focus. Turn the focus ring until the moon’s craters appear razor-sharp.
Once focused, lock it in place if your lens allows, or be careful not to bump it.
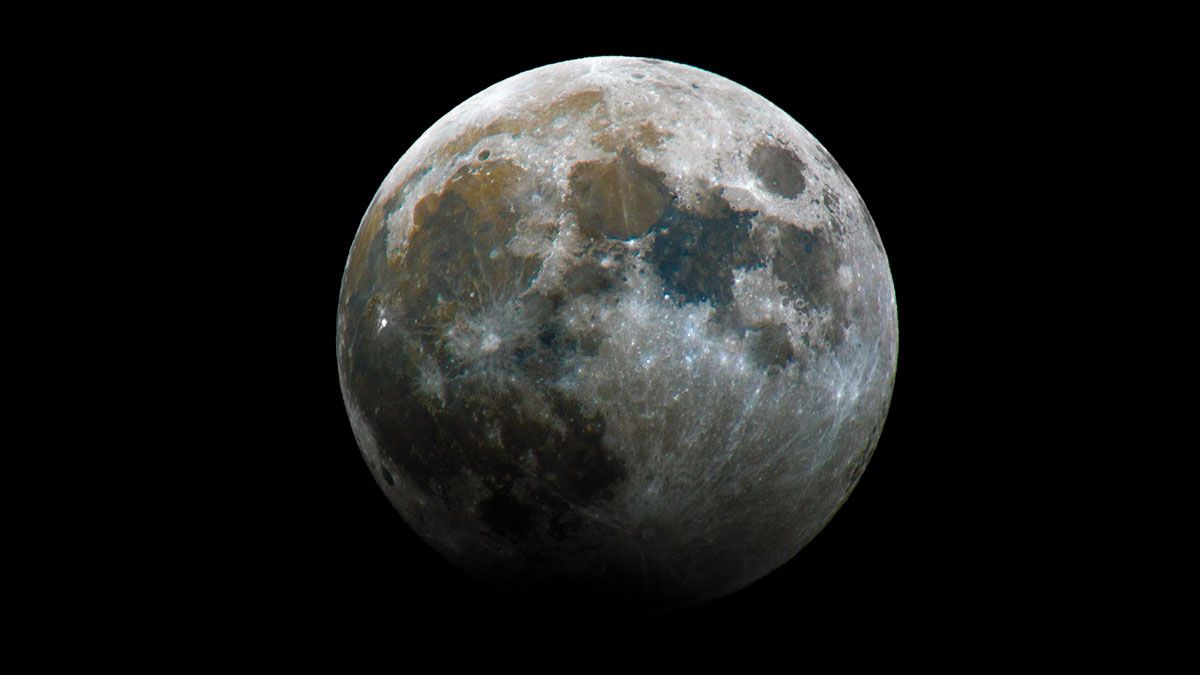
White Balance: Capturing the Moon’s True Hue
Setting your white balance to ‘Daylight’ or ‘Tungsten’ can often yield pleasing results. ‘Daylight’ will give you a cooler, more natural moon color.
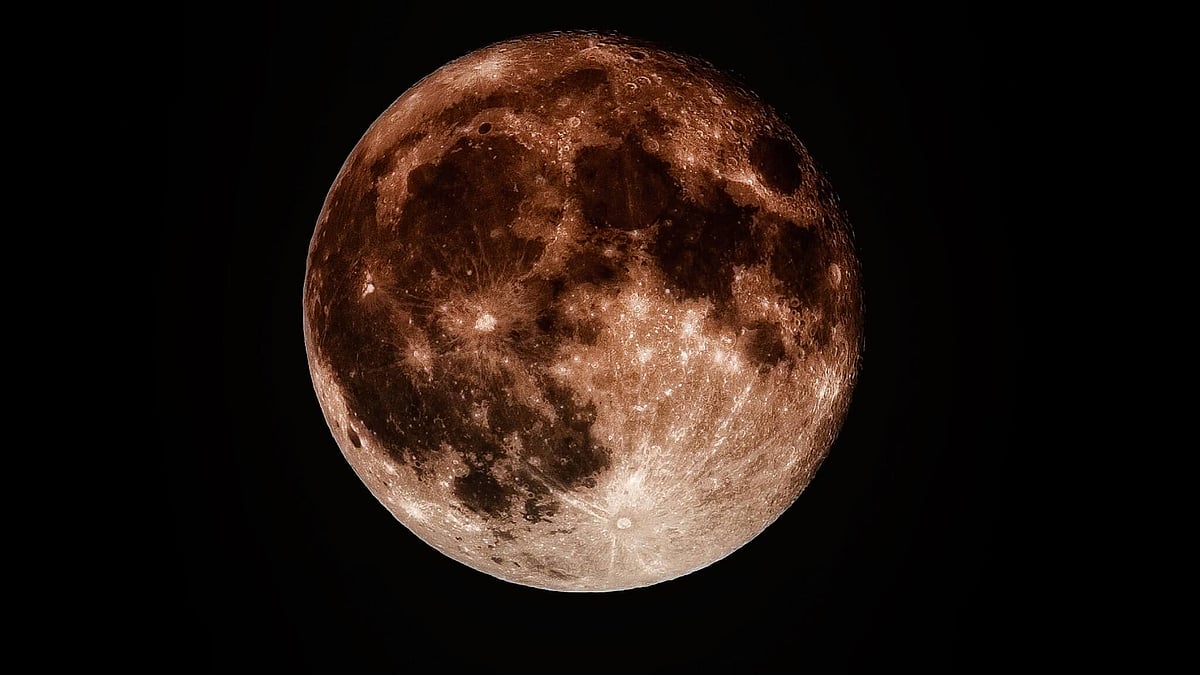
However, during moonrise or moonset, the atmosphere can give the moon a beautiful orange or yellow hue. You might want to use ‘Auto’ or experiment with custom Kelvin settings (e.g., 3200K-4500K) to capture this warmth.
Shooting in RAW format gives you the most flexibility to adjust white balance in post-processing.
Planning Your Shot: The Key to Success for March 2026 Full Moon Photography
Preparation is half the battle when it comes to astrophotography. For the March 2026 Full Moon Photography Tips, meticulous planning will elevate your images from good to extraordinary.
Don’t leave anything to chance; a well-thought-out plan ensures you’re in the right place at the right time.
Timing is Everything: Moonrise and Moonset
The most dramatic full moon shots often occur during moonrise or moonset. At these times, the moon appears larger due to atmospheric lensing and can have a rich, warm color.
Use apps like PhotoPills or PlanIt Pro to accurately predict moonrise, moonset times, and its trajectory. These apps are invaluable for scouting locations and determining where the moon will appear in the sky relative to your desired foreground.
Arrive well in advance to set up your gear and compose your shot.
Location Scouting: Finding Your Perfect Foreground
A solo moon shot is impressive, but a moon integrated into a compelling landscape is often more impactful. Scout locations during the day to identify interesting foreground elements.
Look for silhouettes, unique structures, trees, mountains, or cityscapes. Consider light pollution in your chosen area; darker skies are generally better for clarity.
The foreground provides context and scale, turning a simple moon shot into a story.

Here’s a quick guide to planning considerations:
| Planning Aspect | Key Consideration | Recommended Tool/Action |
|---|---|---|
| Moonrise/Moonset Times | Capture the moon low on the horizon for dramatic effect and color. | PhotoPills, PlanIt Pro, local astronomy websites. |
| Moon Trajectory | Understand the moon’s path across the sky relative to your foreground. | Augmented Reality (AR) features in planning apps. |
| Light Pollution | Minimize skyglow for clearer shots, especially of the surrounding sky. | Light Pollution Maps (e.g., Dark Site Finder). |
| Weather Conditions | Clear skies are essential. Avoid heavy cloud cover and high humidity. | Reliable weather forecast apps (e.g., AccuWeather, Clear Outside). |
| Foreground Elements | Identify interesting subjects to frame the moon or create silhouettes. | Daytime scouting, Google Earth, physical visits. |
| Equipment Check | Ensure all gear is charged, clean, and functioning before heading out. | Create a checklist and pack the day before. |
Checking the Weather Forecast
Clear skies are a full moon photographer’s best friend. Constantly monitor the weather forecast leading up to March 25th, 2026.
Look for low cloud cover and minimal atmospheric haze. Even a thin layer of clouds can obscure details or significantly diminish the moon’s brightness. Be prepared to shift your plans if the forecast changes.
Flexibility is an important trait for astrophotographers.
Composition Techniques for Stunning Moon Images
Beyond technical settings, composition is where your artistic vision truly shines. How you frame the moon can dramatically alter the impact of your photograph.
Consider these composition tips for moon photography to elevate your shots.
The Solo Moon: Pure Detail
For a classic, detailed shot, fill the frame with the moon itself. This emphasizes its texture, craters, and luminous glow.
Use your longest telephoto lens and focus critically. The simplicity of this composition highlights the moon’s inherent beauty.
This is often the first type of shot photographers attempt.
Moon with Foreground: Adding Context and Scale
As mentioned, incorporating a strong foreground element creates a compelling narrative. The moon becomes a character in a larger scene.
Experiment with silhouettes of trees, buildings, or mountain ranges. This contrast between the bright moon and a dark foreground is visually striking.
Pay attention to the rule of thirds to place your moon and foreground effectively.
Creative Silhouettes and Lens Compression
Using a long telephoto lens not only magnifies the moon but also creates lens compression. This optical effect makes distant objects appear closer together.
You can make the moon appear massive behind a person, a landmark, or an animal. This requires precise alignment and often communication with your subject (if applicable).
The dramatic scale achieved through lens compression is truly awe-inspiring.
Moon Trails: Capturing Movement
For a more abstract and artistic approach, try capturing moon trails. This involves taking multiple long exposures over a period (e.g., 30 minutes to an hour) as the moon moves across the sky.
Later, you stack these images in post-processing to create light trails. This technique offers a unique perspective on the moon’s journey.
It’s a creative way to show the passage of time.
Post-Processing Your Lunar Masterpieces
The magic doesn’t end when you click the shutter. Post-processing is a crucial step to refine your images and bring out their full potential.
Whether you’re using Adobe Lightroom, Photoshop, or another editor, these editing tips for moon photos will help.
Basic Adjustments: Exposure and Contrast
Start with global adjustments. Adjust the exposure slightly to ensure the moon is well-exposed without being blown out or too dark. Increase contrast to make the craters and textures pop.
Be subtle; over-editing can make the image look unnatural. The goal is to enhance, not transform.
These foundational edits lay the groundwork for further refinements.
Sharpening and Noise Reduction
Due to the high ISOs sometimes used or simply the nature of distant subjects, some noise might be present. Apply noise reduction carefully, especially in the darker sky areas.
Then, sharpen the moon to bring out its intricate details. Be mindful not to over-sharpen, which can create halos or artifacts.
Find a balance that enhances detail while maintaining a natural look.
Color Correction and White Balance Finesse
Even if you set your white balance in-camera, fine-tuning it in post-processing can make a difference. Adjust the white balance to achieve the desired mood—cooler for a classic silver moon or warmer for a rich, golden hue.

Experiment with saturation and vibrance, but keep them subtle. The moon’s colors are usually delicate.
RAW files provide the most flexibility for these adjustments.
Dodging and Burning for Dimension
Advanced techniques like dodging (lightening) and burning (darkening) can add dimension to your moon. You can selectively lighten brighter areas or darken shadows to enhance depth.
This technique mimics traditional darkroom methods. Use it sparingly to guide the viewer’s eye and emphasize textures.
Careful application can make your moon images truly shine.
Advanced March 2026 Full Moon Photography Tips
Once you’ve mastered the basics, you might want to explore more sophisticated techniques. These advanced moon photography techniques can push your creative boundaries.
They often require a bit more effort but can yield spectacular results.
Image Stacking for Unparalleled Detail
For incredibly sharp and detailed moon images, consider image stacking. This involves taking multiple rapid shots of the moon (e.g., 10-20 or more).
Then, use specialized software (like Registax or AutoStakkert!) to align and stack these images. Stacking helps reduce atmospheric distortion and noise, bringing out an astonishing amount of detail.
This is a favorite technique among serious lunar photographers.
Blending Exposures: Moon and Landscape
When capturing the moon with a dark landscape, it’s often impossible to get a perfect exposure in a single shot. The moon will be overexposed, or the landscape will be underexposed.
The solution is exposure blending. Take one exposure for the moon (following the Looney 11 rule) and another longer exposure for the foreground/landscape.
Then, blend these two exposures together in Photoshop using masks. This technique ensures both elements are perfectly exposed and detailed.
Time-Lapses of the March 2026 Full Moon
A time-lapse offers a dynamic way to show the moon’s journey across the night sky. Set your camera to take photos at regular intervals (e.g., every 5-10 seconds) for an hour or more.
Later, compile these images into a video sequence. This showcases the moon’s movement and the changing ambient light.
It’s a mesmerizing way to present the celestial event.
Overcoming Common Challenges in Full Moon Photography
Even with the best planning, challenges can arise. Knowing how to troubleshoot on the fly is a valuable skill for any photographer.
Here are some common hurdles and how to overcome them for your March 2026 Full Moon Photography endeavor.
Dealing with Light Pollution
Light pollution from cities can wash out the night sky and reduce the clarity of your moon shots. If you can’t escape to a dark sky site, try to position yourself so city lights are behind you or off to the side.
Using a good lens hood can help reduce glare. In post-processing, you can use local adjustments to selectively darken bright areas of the sky without affecting the moon.
Light pollution filters can also be somewhat effective, but their impact varies.
Atmospheric Haze and Turbulance
Haze and atmospheric turbulence can cause the moon to appear blurry or less sharp. This is particularly noticeable when the moon is low on the horizon.
Wait until the moon is higher in the sky for clearer views, as you’re looking through less of Earth’s atmosphere. Shooting multiple shots and stacking them can also help mitigate the effects of turbulence.
Patience is key when dealing with atmospheric conditions.
Cloudy Skies: A Photographer’s Nemesis
Unexpected clouds can quickly ruin your plans. Always have a backup plan or an alternative location in mind if clouds roll in. Sometimes, thin clouds can add a dramatic effect, creating a halo around the moon.
However, heavy cloud cover will make it impossible to get a clear shot. Be prepared to reschedule if necessary; the moon will always return.
Flexibility is paramount when nature dictates the terms.
Final Thoughts on March 2026 Full Moon Photography
Capturing the full moon is a rewarding experience that combines technical skill with artistic vision. As we look forward to the March 2026 Full Moon Photography Tips coming to life, remember that practice makes perfect.
My journey has taught me that every full moon offers a new opportunity to learn and create something beautiful. Don’t be afraid to experiment, to try new angles, and to push the boundaries of what you think is possible. From meticulous planning to thoughtful post-processing, each step contributes to your final masterpiece.
Embrace the challenge of the night sky, and let your creativity illuminate the Full Worm Moon of 2026. The satisfaction of a perfectly captured lunar image is truly unparalleled.
Frequently Asked Questions
When is the March 2026 Full Moon (Worm Moon) and why is it called that?
The March 2026 Full Moon, known as the Worm Moon, is expected to occur around March 25th, 2026. It’s called the Worm Moon because, in Native American traditions, this time marks the thawing of the ground and the emergence of earthworms, signaling the arrival of spring.
What are the most crucial camera settings for sharp full moon photos?
For sharp full moon photos, start with the ‘Looney 11’ rule: f/11 aperture, and shutter speed equal to 1/ISO (e.g., ISO 100, 1/100s shutter). Keep your ISO as low as possible (100-200), use manual focus, and ensure your white balance is set to Daylight or custom Kelvin for natural colors.
What equipment is essential for capturing the March 2026 Full Moon?
Essential equipment includes a DSLR or mirrorless camera, a sturdy tripod, a remote shutter release, and crucially, a telephoto lens (200mm or longer) for detailed shots. For moon-in-landscape shots, a wide-angle lens can also be valuable. Don’t forget extra batteries and a headlamp!
How can I make the moon appear larger in my landscape photos?
To make the moon appear larger in landscape photos, use a long telephoto lens and position yourself far away from your foreground subject. This creates an optical effect called ‘lens compression,’ making distant objects (like the moon) appear closer and larger in relation to the foreground.